


How to build Adaptive Cards for MS Teams with AI in 5 Easy Steps
With Looply you can automatically generate Microsoft Adaptive Cards for use in your Teams processes using built-in AI.
Here’s how to build your own card in 5 easy steps:
- Decide what you want
Decide on any headings and texts.
Determine exactly what SAP fields you want to be included in the card, and which fields are input fields versus read-only fields.
Decide what action buttons you want to include, and whether any texts should become mandatory – for example, a rejection reason text if a Reject option is selected.
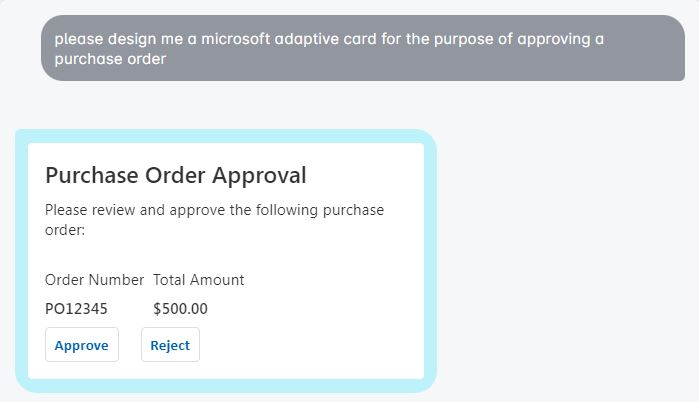
Let’s imagine that I want a card to approve the creation of a new Supplier in SAP – exactly what fields do I need to be able to see to make the approval decision? Given that many checks can be automated, like the check for duplicates, we might decide that the approval step is to capture exceptions – so what fields do I need to see inside the card?
- Describe what you want
In Looply, open the option to create a New Card with AI.
Describe the step of the business process and watch the AI construct your card
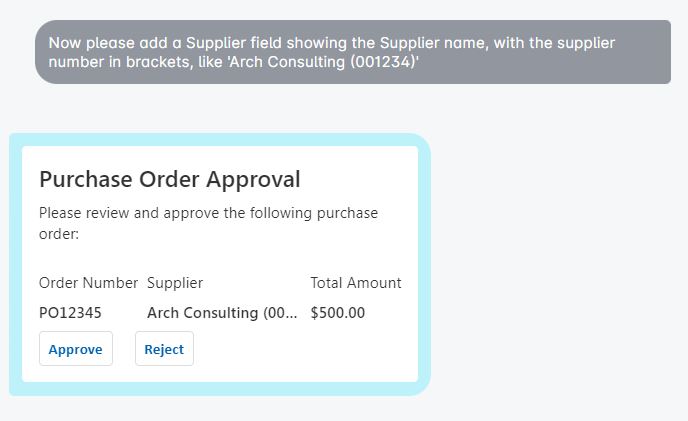
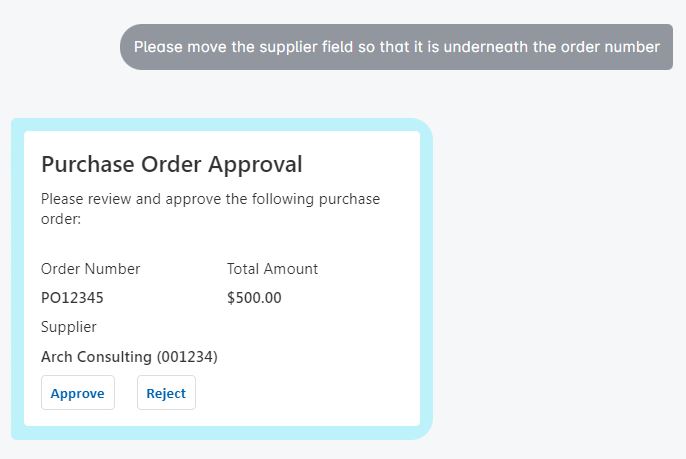
- Now explain what modifications you need
This can be an iterative process, until you have the fields and alignment you want.
…
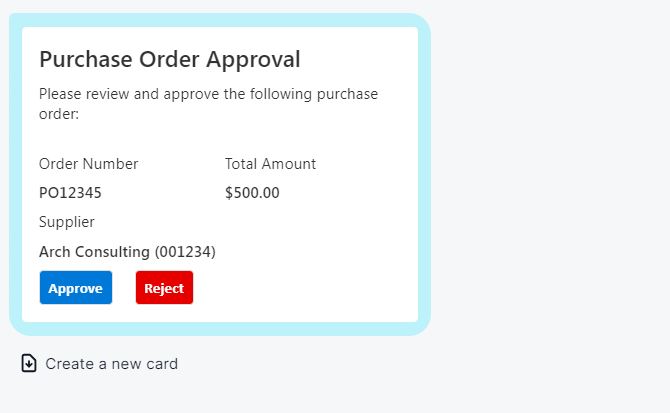
- Create the card
When you are happy, simply hit the ‘Create a new card’ option.
This will then create the card which you can further edit in the Looply Template Designer.
- Rename your card and add field binding
You can now give your card a meaningful name using the Card – Rename option.
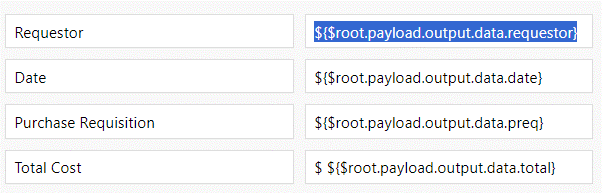
To complete your card design, you must bind each to the payload (data schema) data.
You can also set data to be set for each button when pressed.

Finally, re-save, and your card is now ready to be used in your Looply Workflow!