


How to extend SAP processes to Teams with Looply
In this blog post, we are going to show you how to extend an SAP process to MS Teams with Looply in just four easy steps!
Before we get started, let’s remind ourselves what Looply is: Looply is a cloud platform for the integration of your enterprise systems and Teams.
Looply brings SAP notifications and approvals into Microsoft Teams, so that users are informed instantaneously and decisions can be performed quickly and easily. This removes the need for users to go to SAP applications to deal with work; Looply brings the work to them. That means works gets done faster and can be better managed and done in the place where the employee’s attention is already – in Teams.
So how does it all work? In this post, we will look at a common HR process: travel expense approvals. We will give a high-level overview of how you could bring this process into Looply to save your company time and resources. In just four steps, we will have your travel expenses sorted: 1) set up the integration 2) build an app 3) build a workflow and complete SAP backend configuration 4) and create a card.
Setting up your integrations
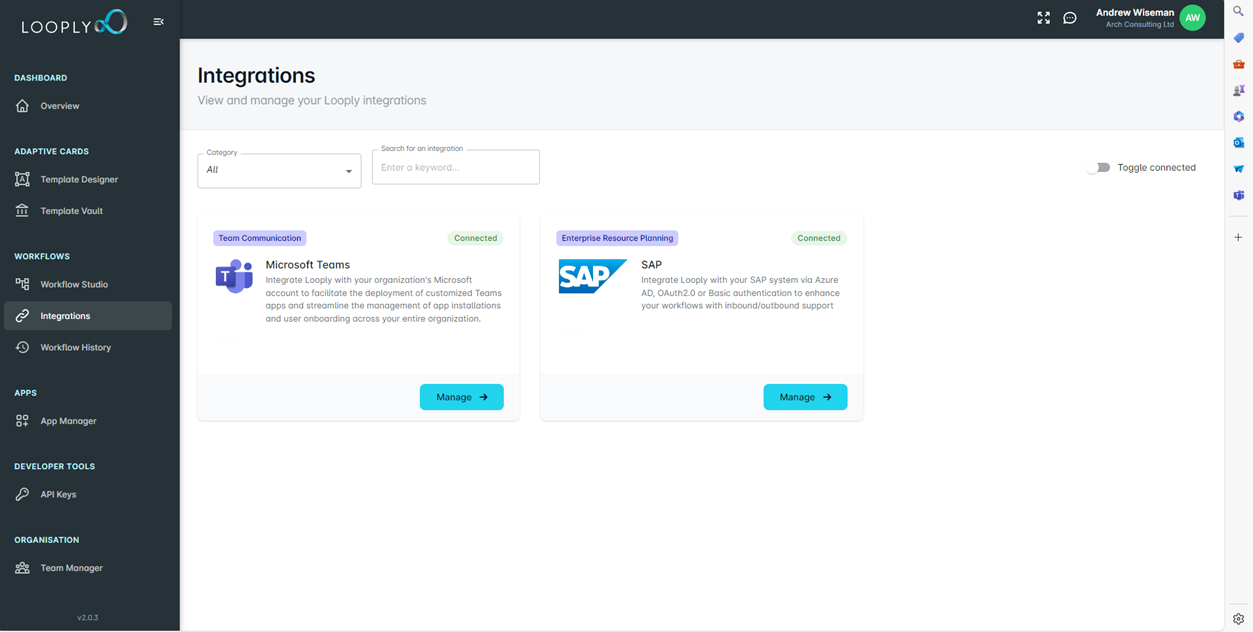
To get Looply talking with your company’s Teams and SAP accounts, you’ll need to set up the integrations. This is dead easy, just head to the “Integration” section on Looply, click “connect/manage” and follow the steps to authenticate your connection.
Building an app
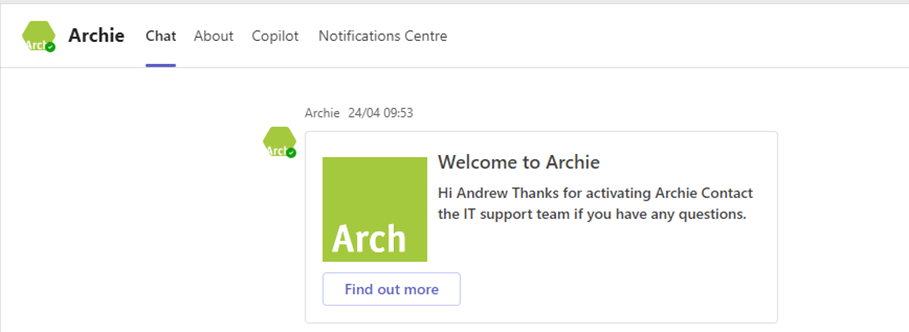
Now that your Teams and SAP systems are connected to Looply, you can begin to extend one of your business processes. The first step to achieve this is to build an app. A Looply app works like a chatbot in Teams. Once you’ve created an app, it can send messages and cards to your users. For example, below you can see a Teams chatbot called “Archie”. Archie is a Looply app.
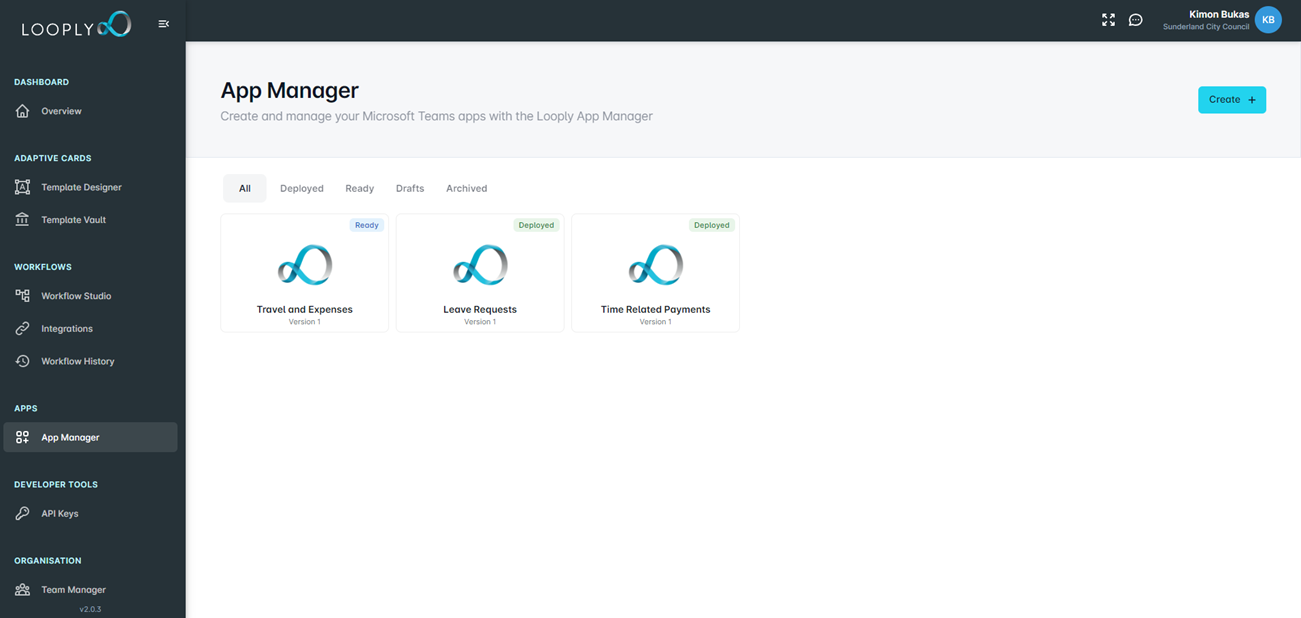
To create an app, just head to the “App Manager” on Looply and click “Create”.
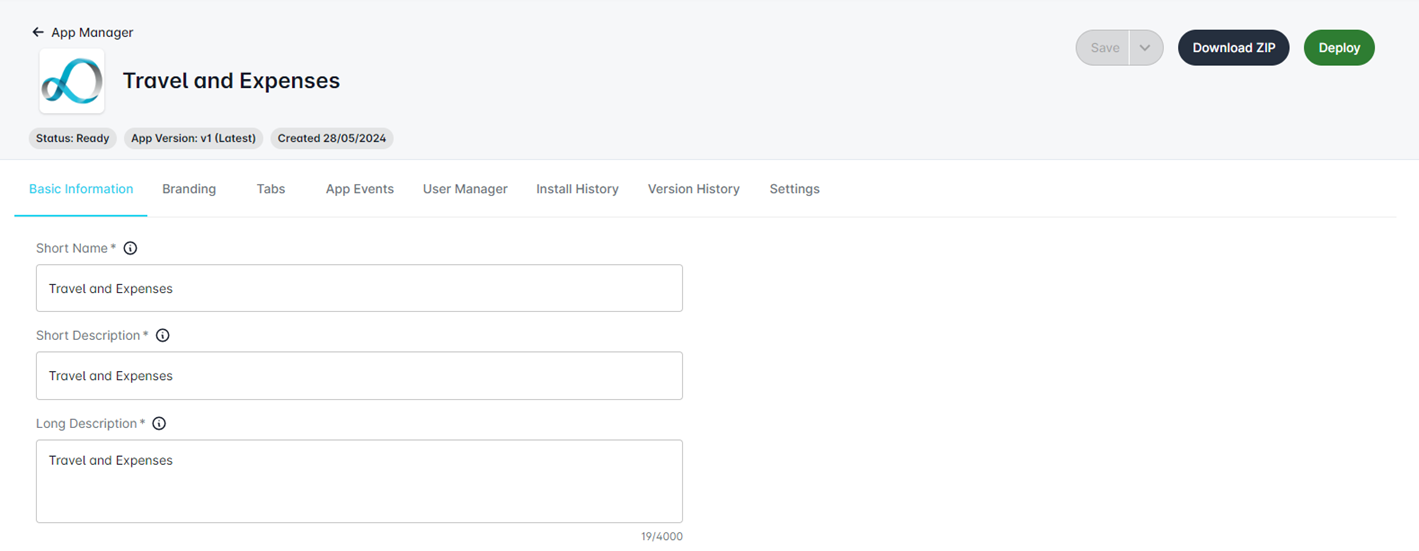
Fill in each of the tabs. In our example, we have called the app “Travel and Expenses” as we will be building an app that handles travel expense approvals. One key section to fill in is the “User Manager”. This is where you select the users that will receive messages from your app. After you have filled in all the information in the app manager, click deploy. At this point, any user you have installed in “User Manager” should receive a message in their Teams app from Looply. You are now ready to build a workflow!
Building a workflow and SAP backend configuration
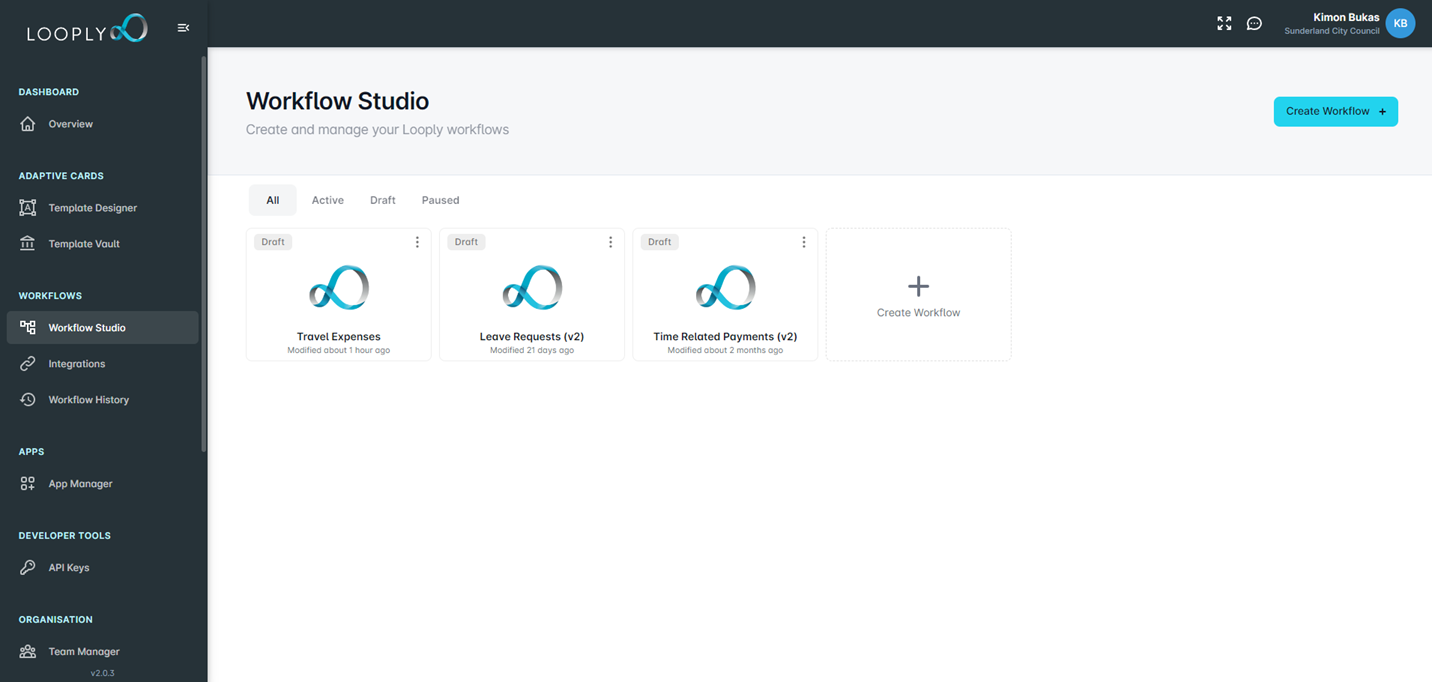
Head on over to the “Workflow Studio”. The Workflow Studio provides developers with the tools they need to streamline and automate business processes.
The drag-and-drop interface is designed to be intuitive, helping developers cut down on the development time that would typically accompany the design of complex integrations. They can visually define triggers, conditions, actions, and responses, resulting in a clear, easy-to-understand map of the process flow.
When you’re ready, click on “Create Workflow”.
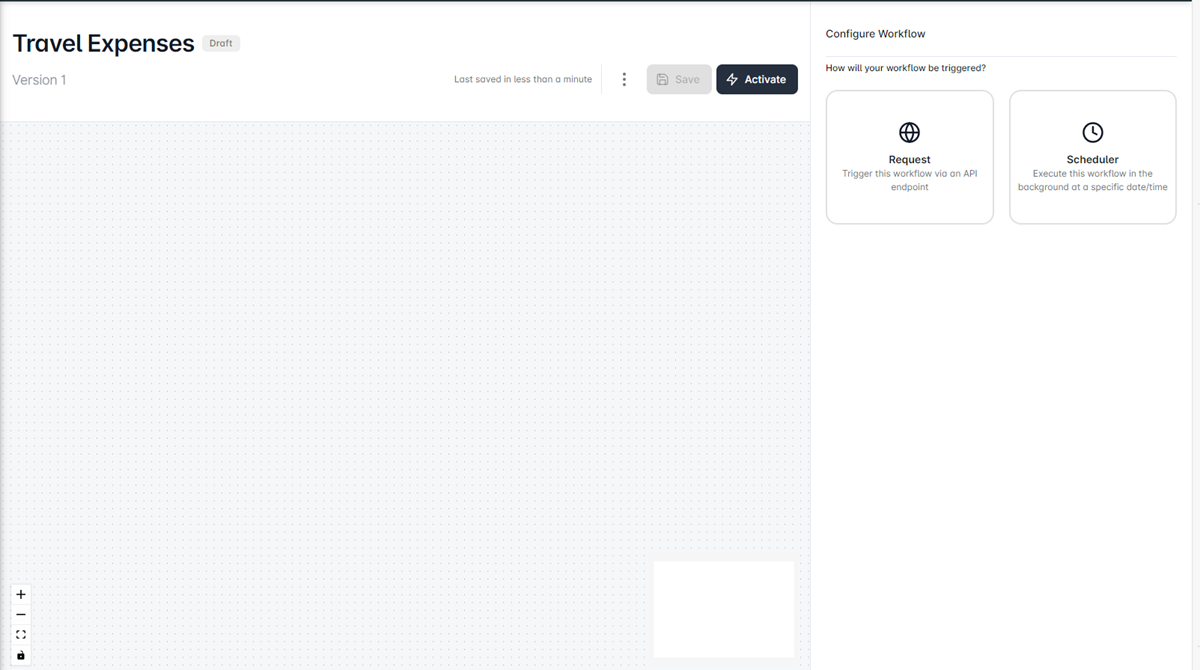
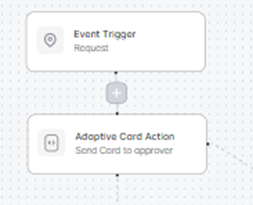
You will start with a blank canvas with drag and drop functionality. The right-side menu has the blocks that you can drag onto your canvas to start the workflow. In our example, we will start with an event trigger.
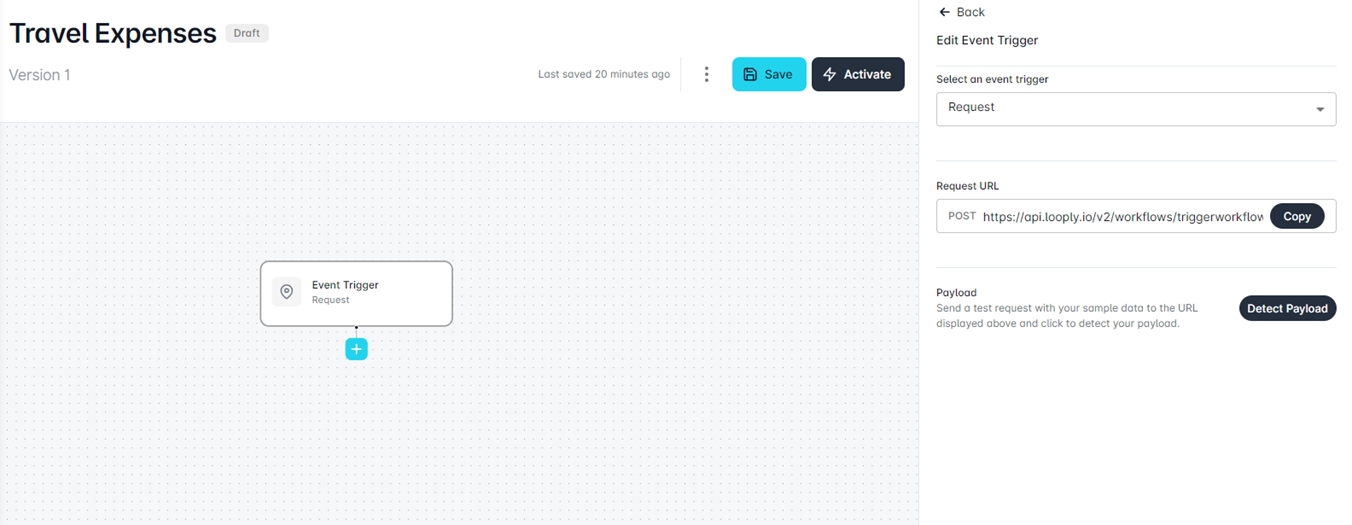
The event trigger will provide us with a Request URL that we will make use of in our backend to talk with SAP.
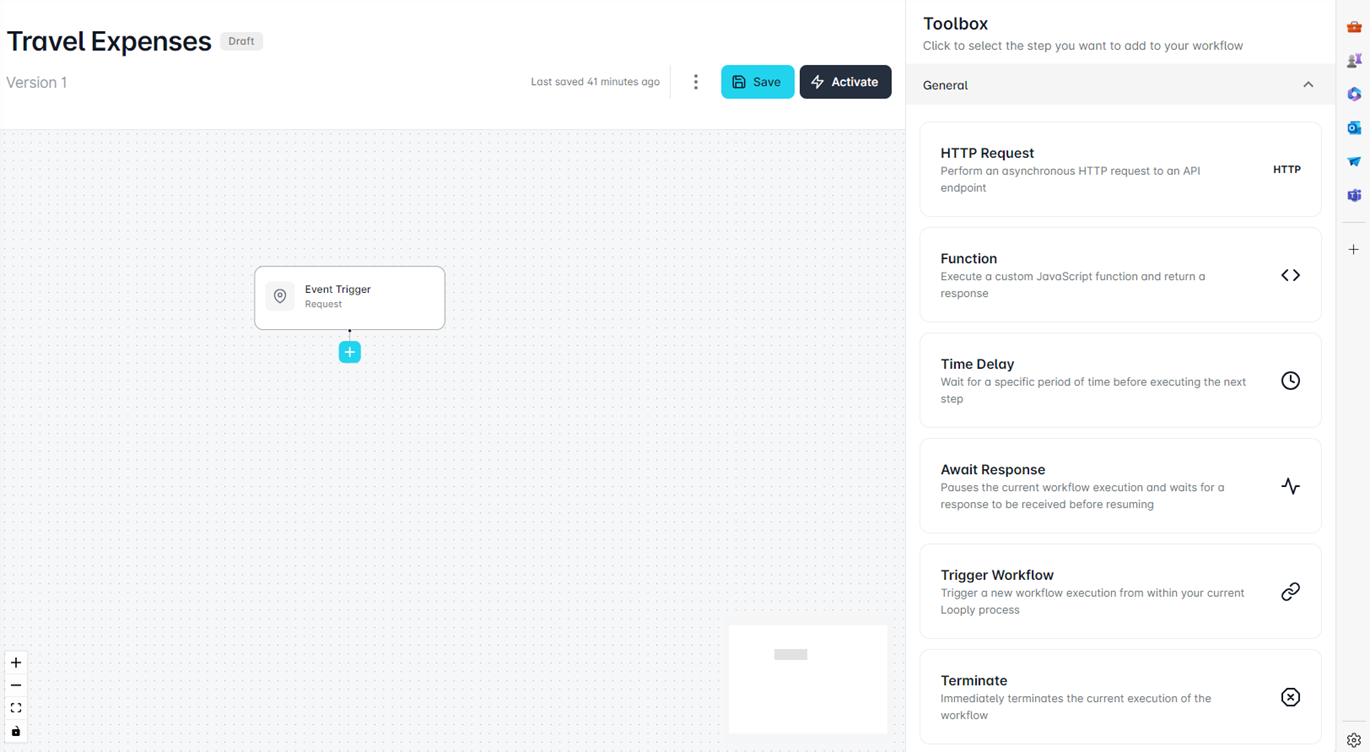
Once we have our trigger, we can click on the plus sign to add other actions. We can see a selection in the picture below.
Before we build the rest of our workflow, we need to sort out some backend configuration. We are creating this workflow to handle travel expense approvals. The event that would trigger this workflow would be someone submitting a travel expense on their SAP system. In our case, this would be an employee submitting a request on a Fiori app, which would then trigger an SAP Workflow.
You would need to have the following configuration set up by your IT manager to use Looply with SAP Workflow:
- Resume and trigger tasks for Looply, which would be inserted into your SAP Workflow to call Looply.
- Data bindings for the activities you put into the SAP Workflow.
- A Looply Process Determination table, which lists different events, Looply Process IDs, and functions.
- A method to call the Process Determination table.
- Functions for triggering your Looply Workflow and passing over the data.
With your backend configuration ready to go, you can then finish building your Looply workflow. In our case, the workflow looks like this:
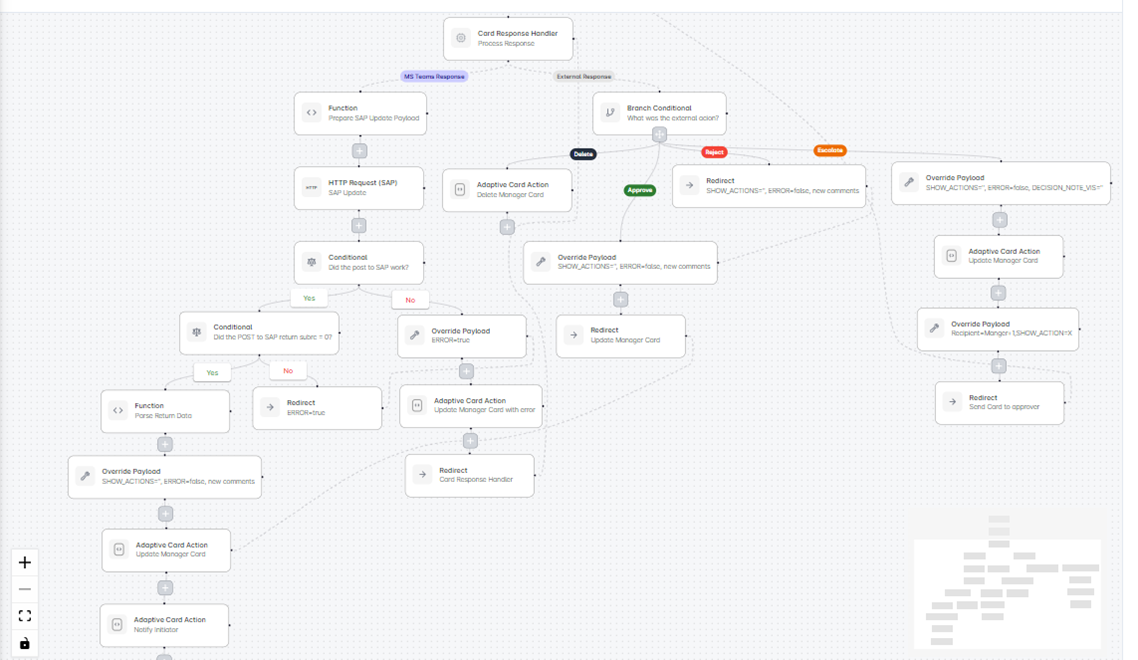
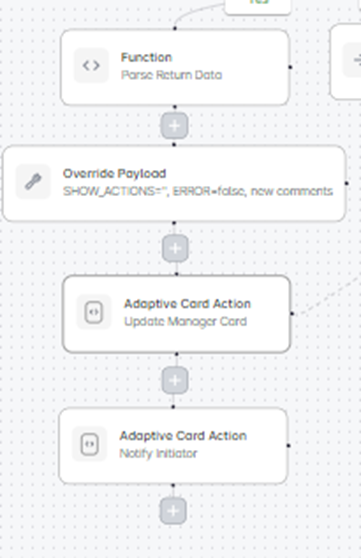
This might look complicated, but we will break it down! The main complexity of our workflow is that it is designed to work whether the employee approves/rejects the expense in MS Teams or the old-fashioned way in Fiori. The first split in our tree between “MS Teams Response” and “External Response” represents this choice between replying to the adaptive card or making an action in Fiori. We will focus on the left-hand side of this workflow to show you how the Teams response works.
Here's the breakdown of the workflow:
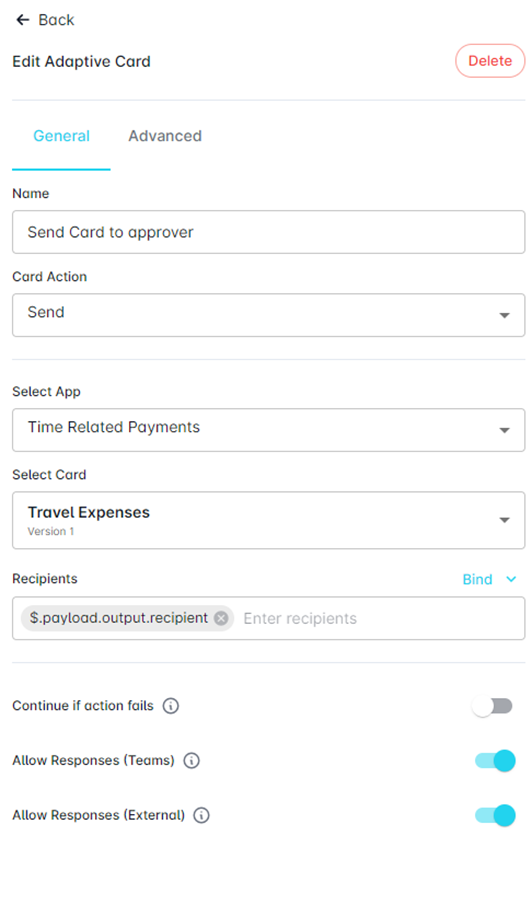
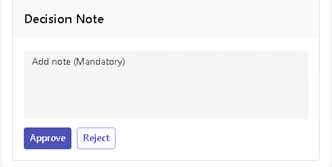
1) The first step after the trigger is an adaptive card action. When the workflow is triggered by a submitted travel expense on Fiori, a card will be sent to the manager to approve or reject the expense. As in the picture below, the card is called “Travel Expenses”. We will look at this card in the next section. But for now it will suffice to note that this is an adaptive card that the employee will receive on Teams, and it has “approve” or “reject”
2) In the next steps pictured below, once the employee has responded to the card, a function is used to provide the parameters of what data will be posted to SAP. The HTTP Request then posts the data from the card. The tree splits depending on whether the post was successful or not.
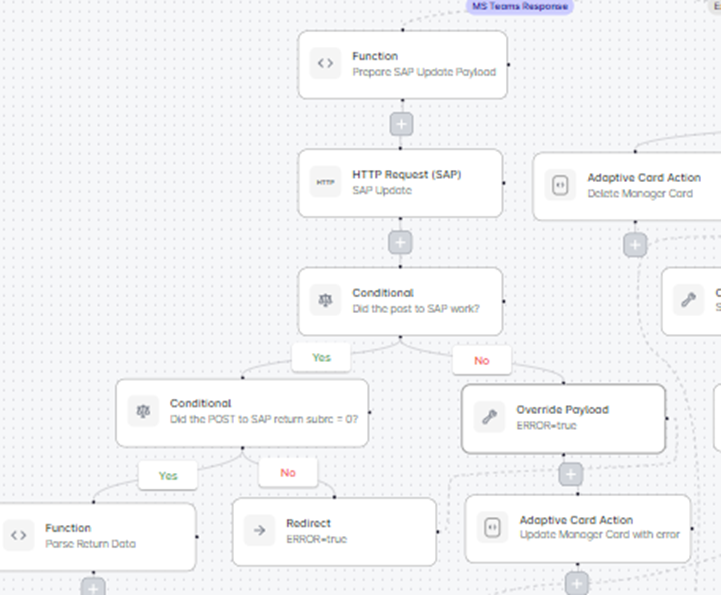
3) If the post was successful, the payload is updated and two new cards are sent; one to the initiator to confirm whether their expense was approved or not, and the other to update the manager on the completed process. The process is then complete!
We mentioned adaptive cards on a few occasions. Let’s see what these cards look like in Looply.
Creating a card
The Adaptive Card Designer, created by Microsoft, has been imported into Looply to create Adaptive Cards for Looply Workflows. It provides an easy way to create beautiful data-rich messages that can be sent to teams. This designer provides massive benefits when combined with Looply as data fetched and generated via Looply Workflows can be bound and displayed to your end users in a dynamic way. The Adaptive Card Designer is here to provide you with the tools to create a template for your Adaptive Card so that in each process a dynamically data-driven card can be created.
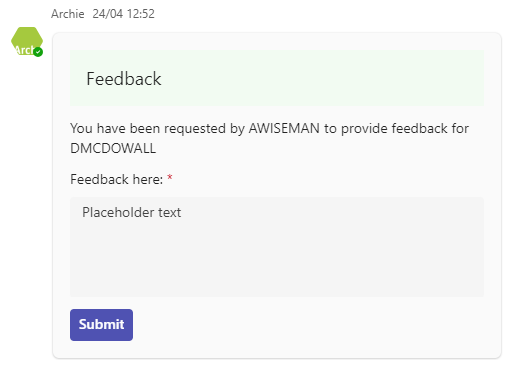
Here is an example of what a card could look like:
So how does the card designer work? Let’s have a look.
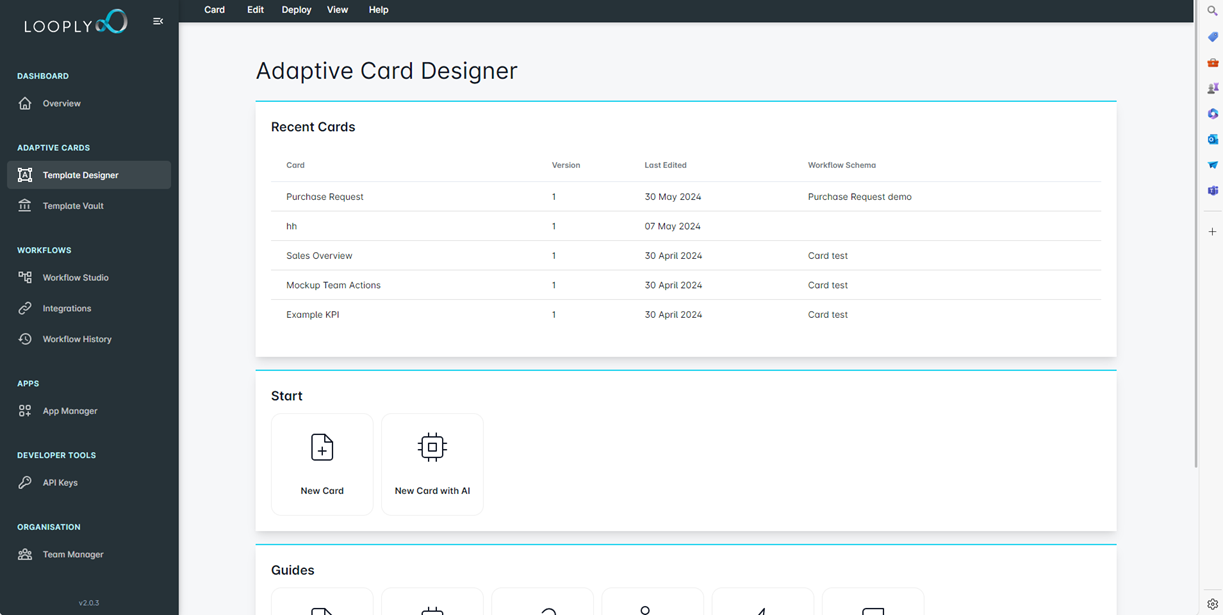
In the “Template Designer” section of Looply, you click on “new card” to get started.
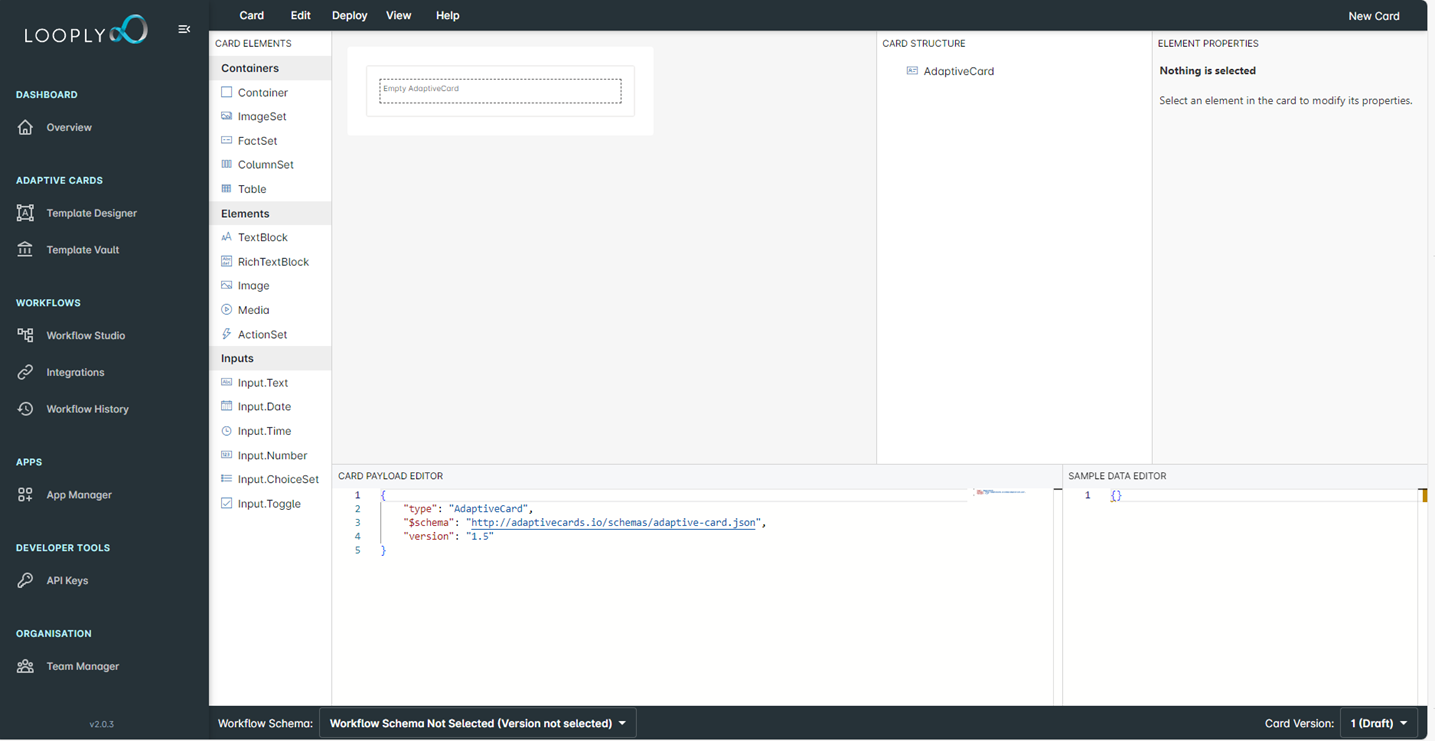
In the designer, there are multiple ways you can build a card: 1) drag and drop 2) the JSON editor 3) and the AI assistant.
1) Drag and Drop: you can drag and drop card elements from the left menu and put them onto your canvas. Then you can adjust each elements settings in the element properties section on the right.
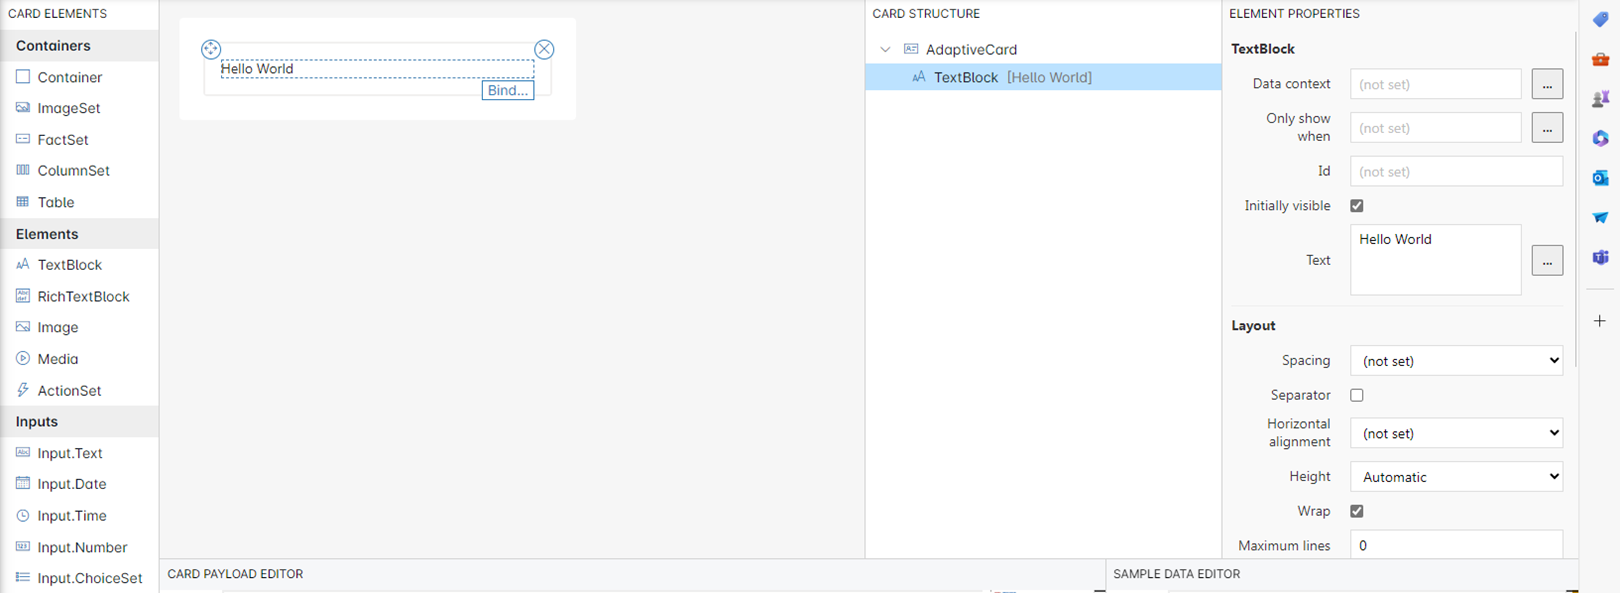
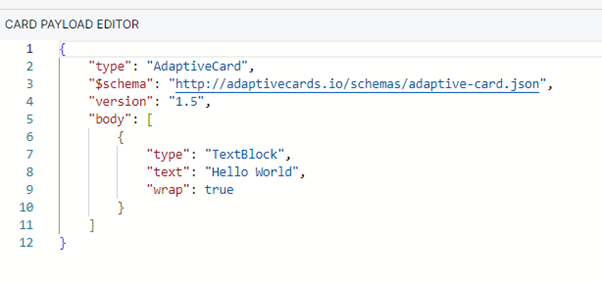
2) JSON Editor: alternatively, you can type directly into the JSON code editor at the bottom of the designer.
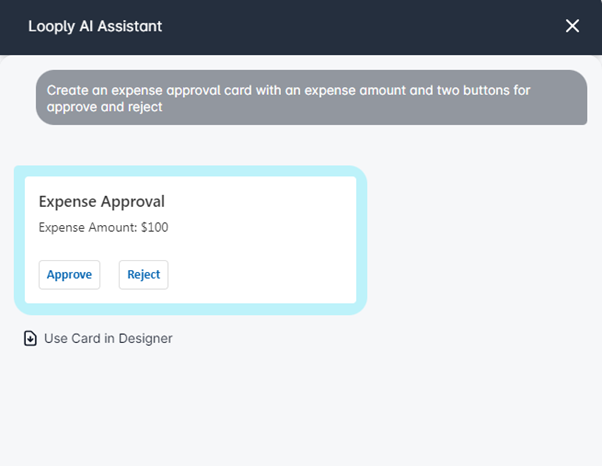
3) Finally, you can use our AI assistant to help you rapidly create cards. Just put in a request and the AI will do the work for you!
Here is what the card we created for our Travel Expenses looks like in the editor:
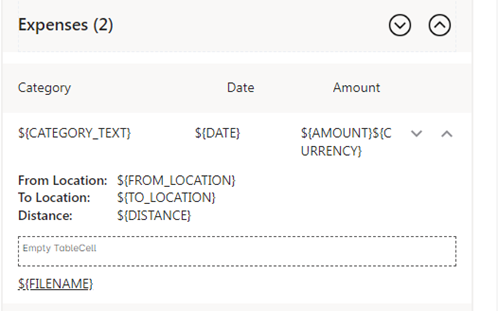
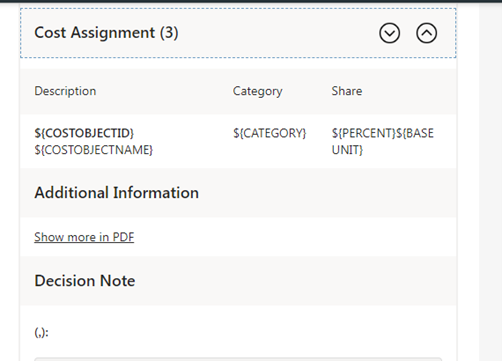
You will note that this is quite a bulky card. The reason for this is that we have used just one card for all the different actions in our workflow. We then hide/show different sections of the card with logic depending on which stage of the workflow we are in. Alternatively, we could create several different cards for the different stages of the workflow. Creating just one card can be helpful for keeping everything in one place and for making version control simpler.
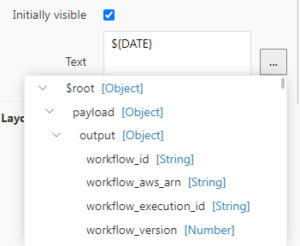
Another important point to note is the binding. All of the text that begins with “$” are variables that are bound in our data schema. This is how you display the data from SAP in your cards. To bind data to an element in the editor, simply click on the “…” next to a field in your element properties, then scroll down and select the desired schema property that you want to bind from the dropdown:
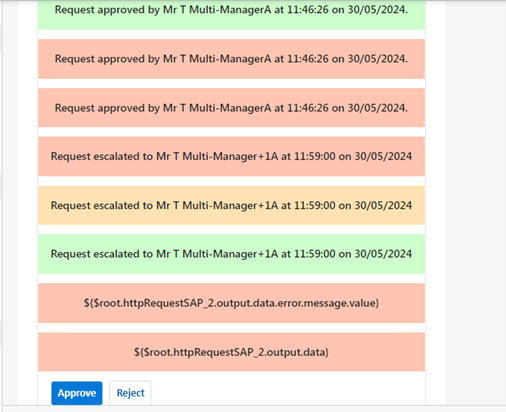
So, what will our card look like in practice outside the editor?
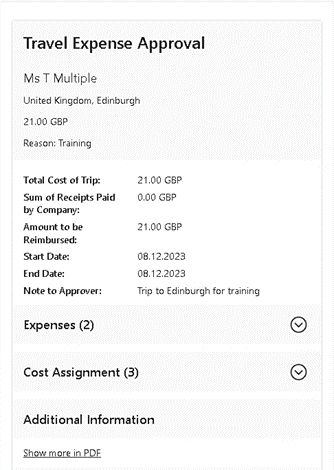
When the card is first sent to the approver, it looks something like this:
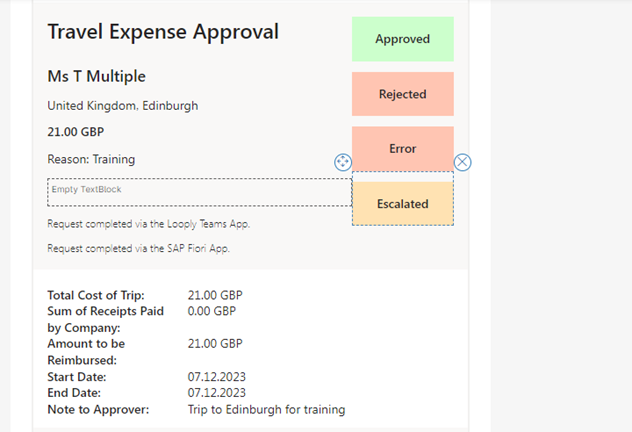
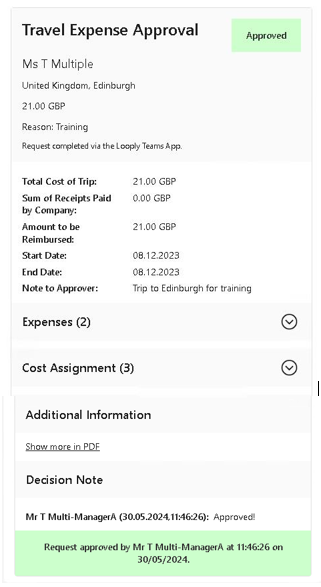
When the manager approves the card, it will look something like this:
And that’s it! You have now made all the components needed to extend a SAP process to Teams with Looply.
Summary
In this blog, we looked at how you can extend an SAP business process to Microsoft Teams with Looply in just a few steps. We examined travel expense approvals, showing you how to build an integration, set up a workflow, build cards, and move the whole process straight into Teams to save your company time and money.
This blog gave a high-level example to help you understand the general concepts that make Looply work. If you are looking for a more granular step by step guide to get down to the nitty-gritty details, keep an eye on this space! We will post regular blogs to help you get Looply working for your enterprise.